Sale Photo Guide
Capture photos that sell your horse
High-quality photos are your horse’s first impression in an online sale. Great images attract attention, build trust, and help you achieve the best sale price. If you're relatively confident with a camera or have a late-model smartphone, getting some decent photos is possible by following some simple steps.
Alternatively, there are some wonderfully talented equine photographers in Australia who specialise in sale photos and will take care of capturing and editing images of your horse. Check out our directory and see if there's an equine photographer near you.
Prepare Your Horse
- Groom well: Clean coat, brushed mane and tail, trimmed hooves.
- Bare is best: Photograph your horse without tack so that buyers can see its features and confirmation.
- Keep tack simple: In images featuring tack, make sure it's clean and fits your horse well.
- Condition counts: A healthy, appropriately-fed and exercised horse looks best.
Get the Lighting Right
- Best time: Early morning or late afternoon (“golden hour”).
- Avoid harsh midday sun: It creates shadows and glare.
- Face the light: Keep the light behind you and on your horse’s side.
Choose Clean Backgrounds
- Pick a simple, uncluttered background — fences, paddocks, or open fields.
- Avoid busy sheds, vehicles, or people in the shot.
- Make sure your horse stands out clearly against the background color.
Capture the Key Angles
- Take a mix of photos to show details of your horse to prospective buyers.
- See the gallery below for examples of good sale photos.
Recommended:
- Head Shot: Camera at eye level, capture a clean side or ¾ head shot with both ears forward.
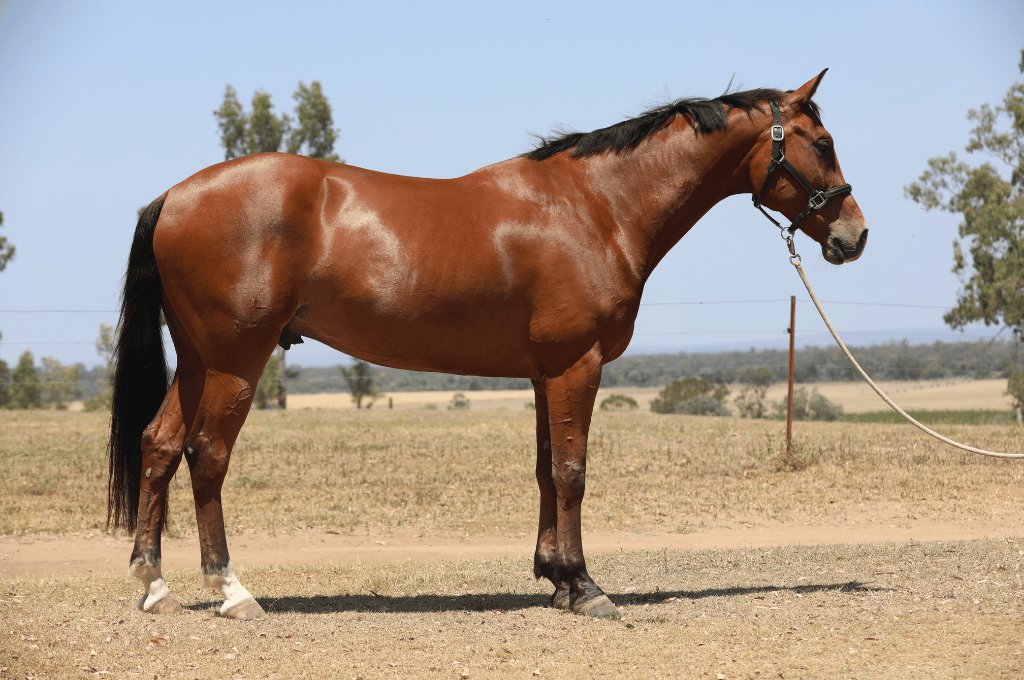
- Near Side: Horse standing square, all four legs and full body visible. Stand your horse square, photograph from the near side at mid-body height, and capture the full horse in even light.
- Off Side: Repeat the same process on the opposite side.
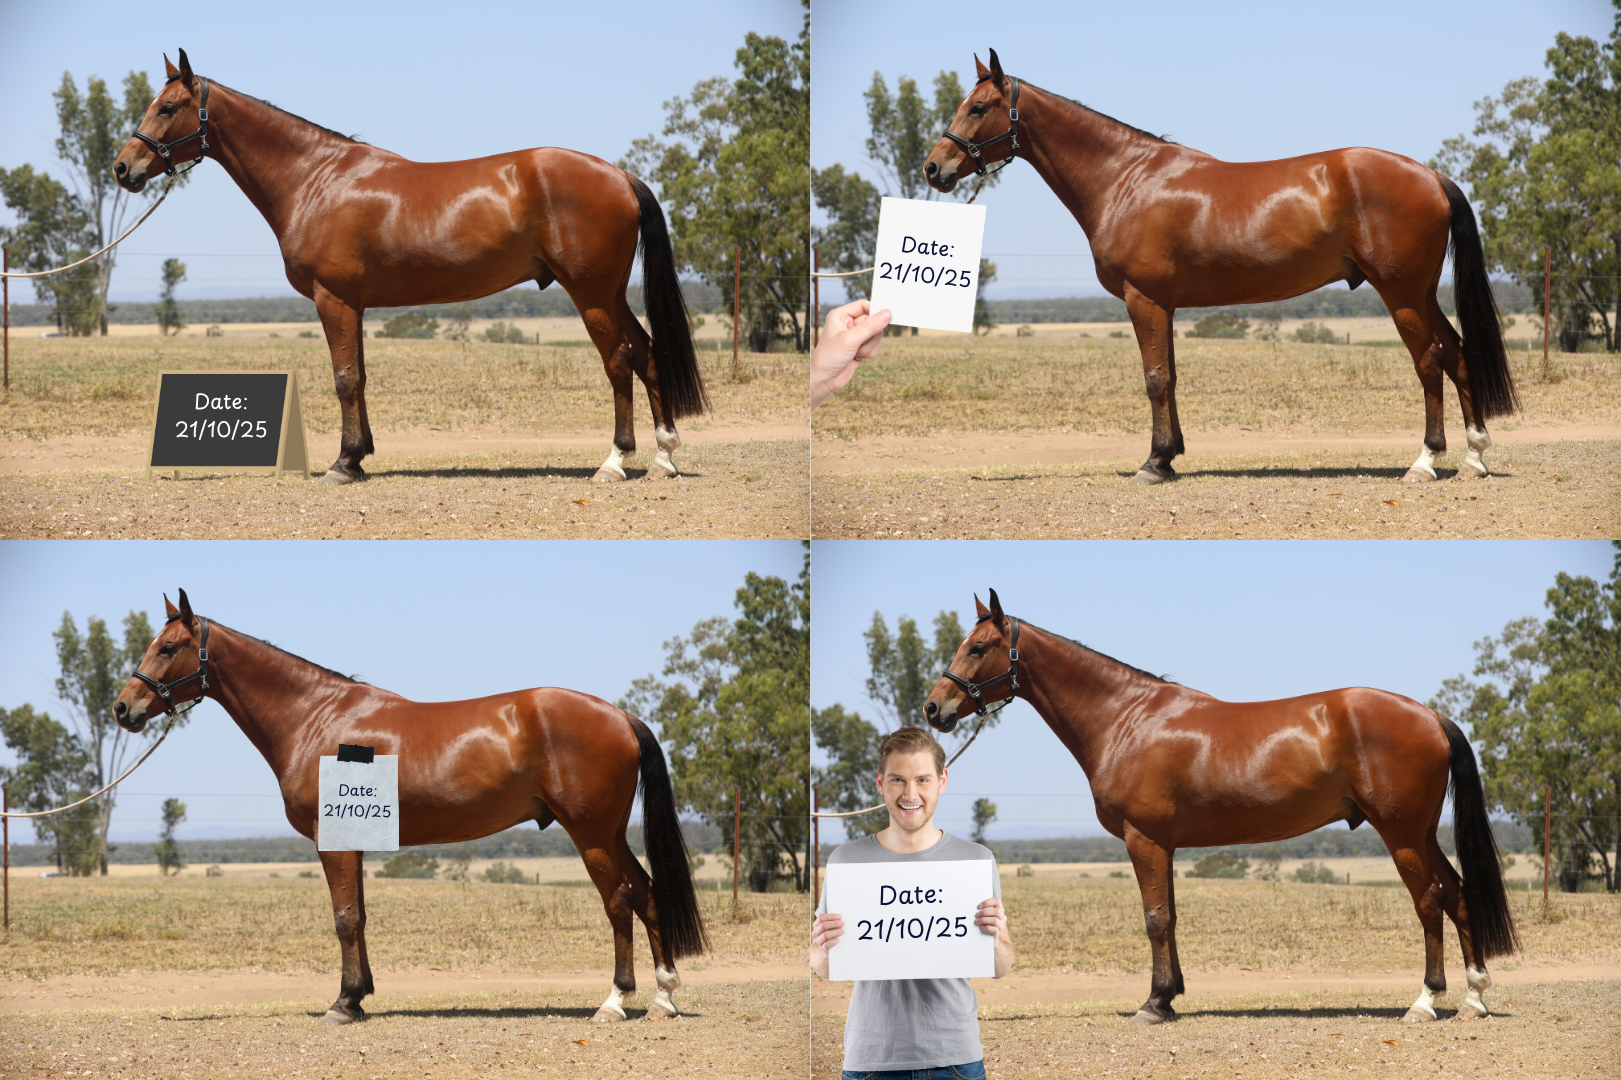
- Current date: Photo of your horse in its current condition featuring date photo was taken. Stand beside your horse in good light, take a clear full-body photo, and ensure the current date is visible in the image.
Optional:
- Front: Stand your horse square facing you, take the photo at chest height, and center the frame so both front legs and the head are evenly visible in good light.
- Rear: Stand behind your horse, take the photo at hip height, and center the frame so both hind legs are evenly visible in clear, natural light.
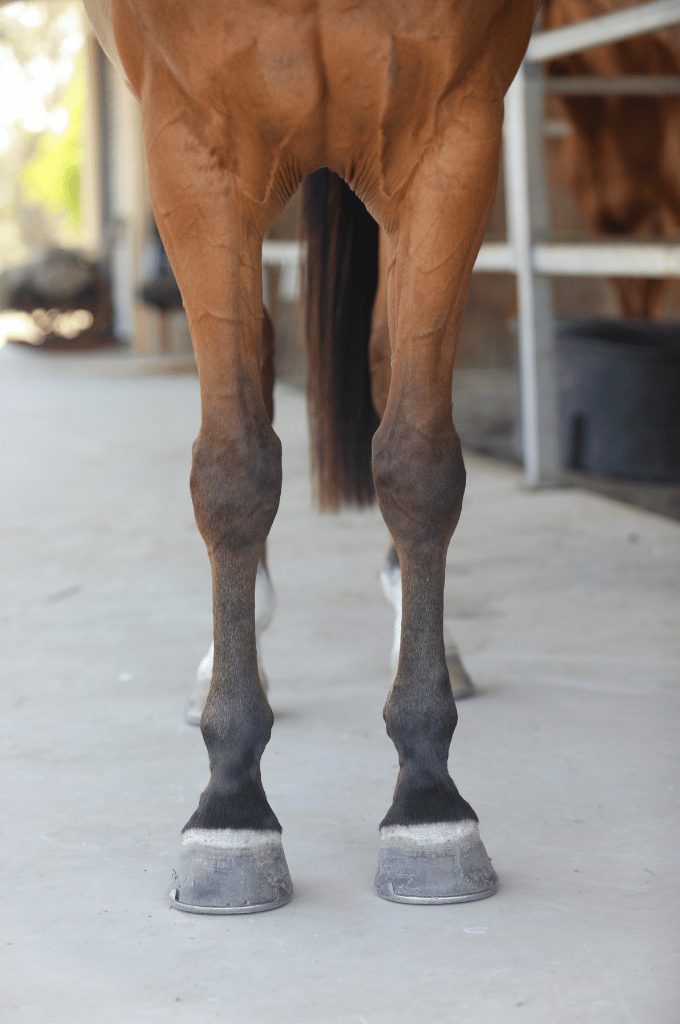
- Front hooves: Stand to the front of your horse at hoof level, focus on the front feet, and capture both hooves clearly in good light on a level surface.
- Rear hooves: Stand to the front of your horse's rear hooves at hoof level, focus on the hind feet, and capture both hooves clearly in good light on a level surface.
- Competition: Images of your horse competing in certain disciplines
- Under tail: For broodmares or prospective breeding stock.
- Action: Walk, trot or canter side-on to show movement.
- Other: Teeth and any distinghuishing features.
Camera Tips
- Use natural light — no flash.
- Keep the camera level (waist or chest height).
- Take many shots — choose the best later.
- Use phone portrait mode or a low f-stop (f/2.8–4) for soft backgrounds.
Final Touches
- You may choose to lightly edit by adjusting brightness and contrast but be careful not to over-edit your images.
- Keep photos true to life. Buyers expect accuracy and you do not want to misrepresent what you're selling.
- Make sure you include all of the mandatory images in your nomination. You can choose to upload additional optional images as well.
Sale Photo Examples
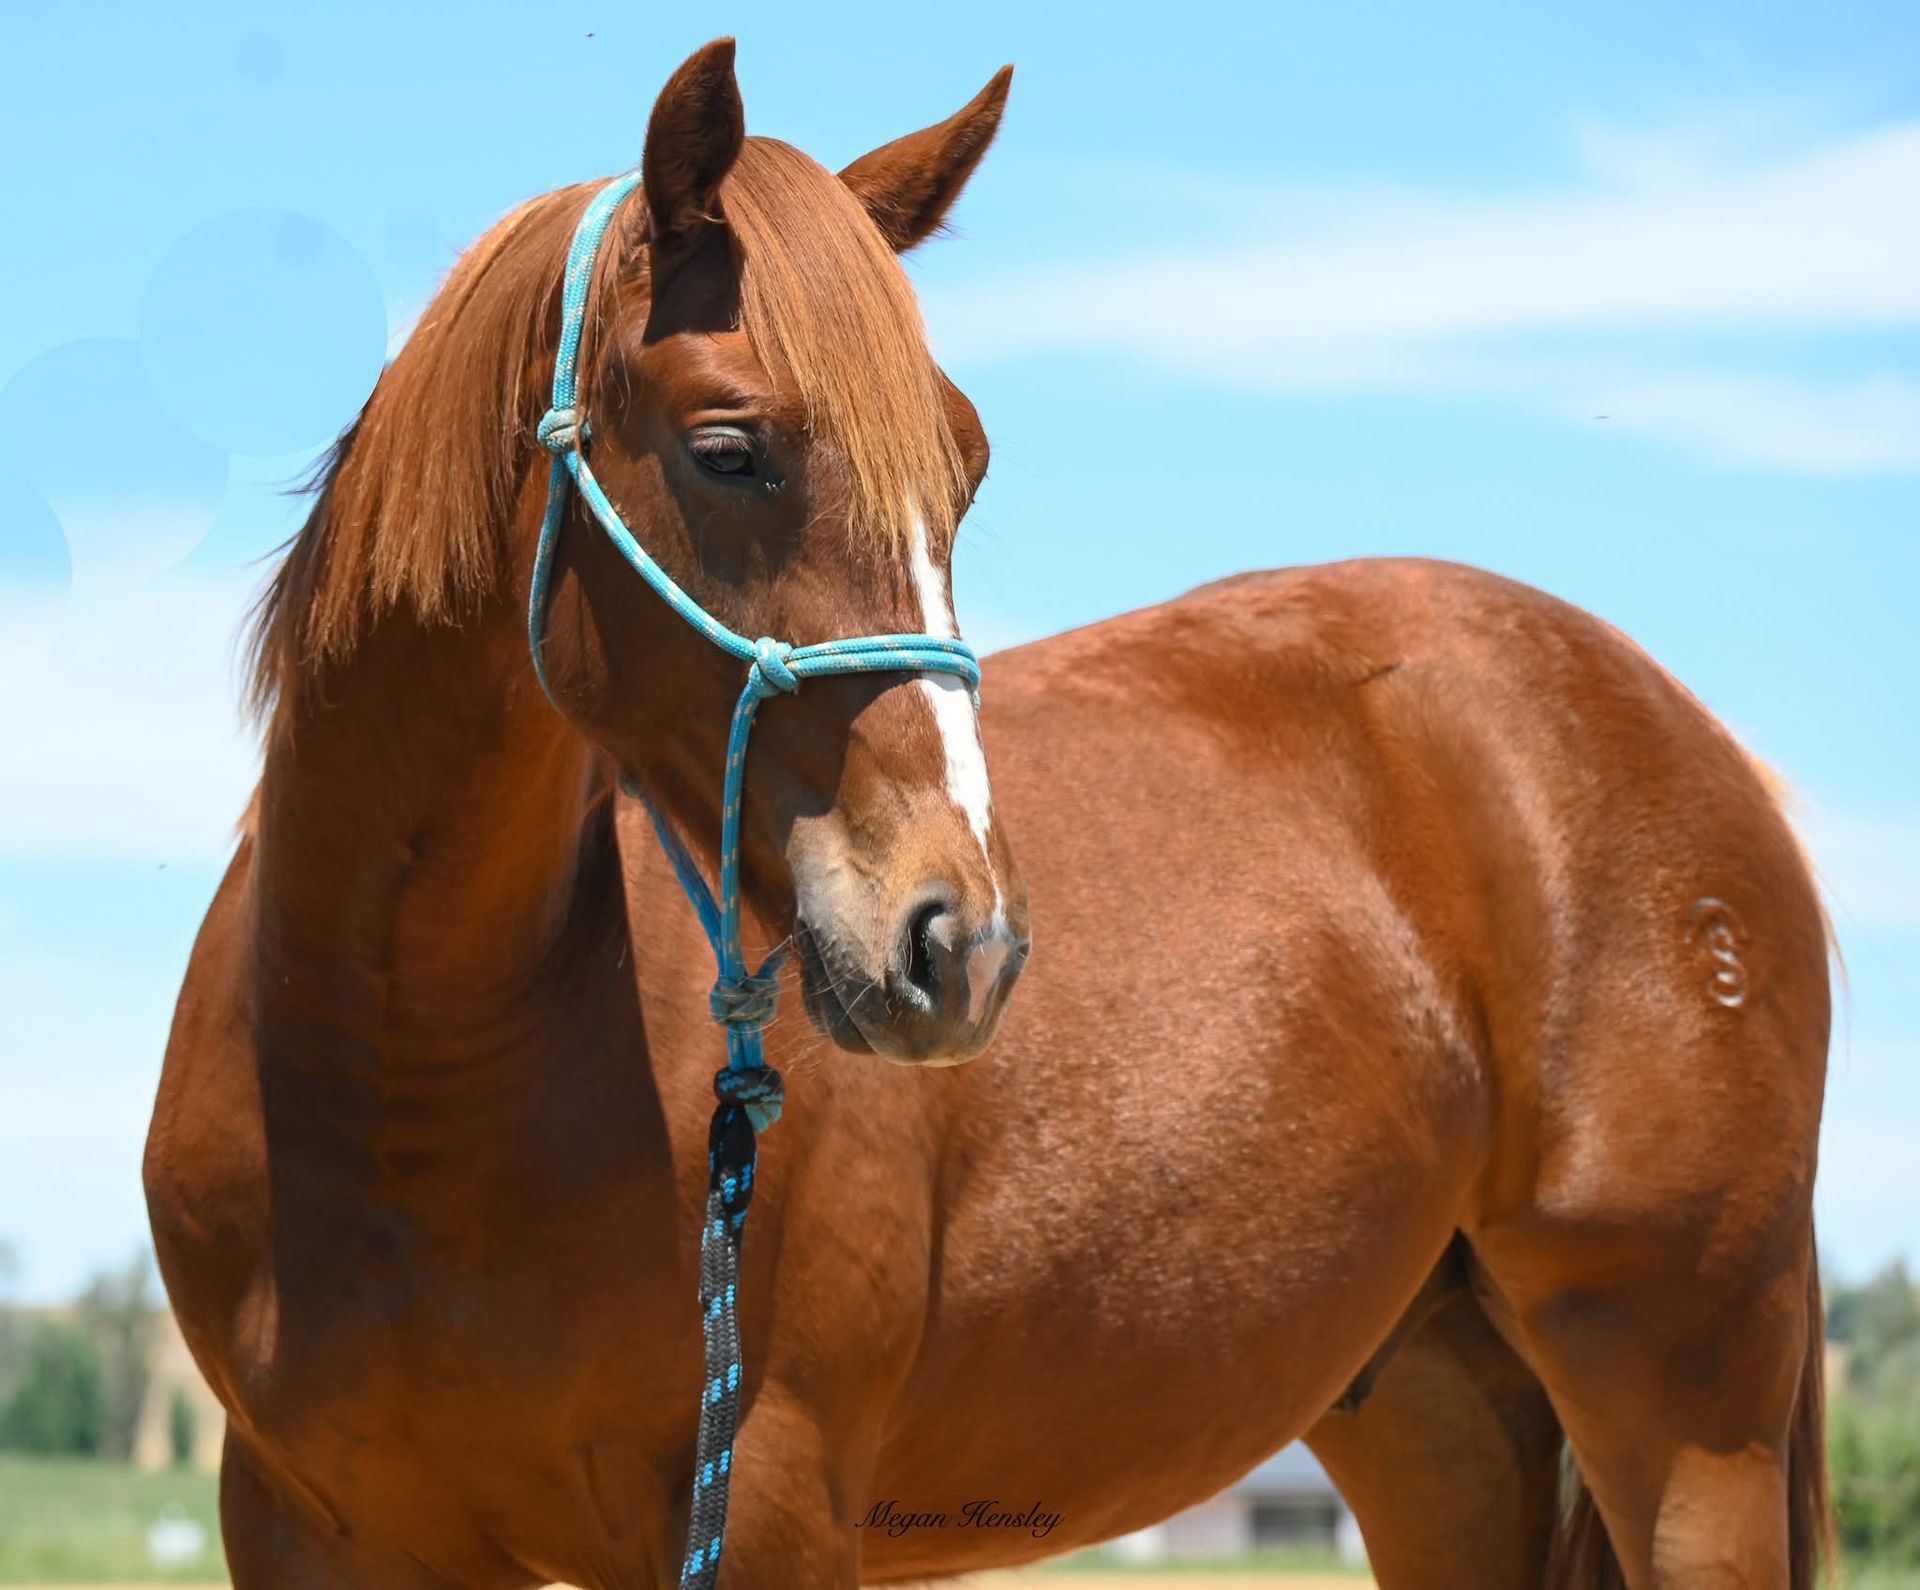
Head Shot
Camera at eye level, capture a clean side or ¾ head shot with both ears forward.

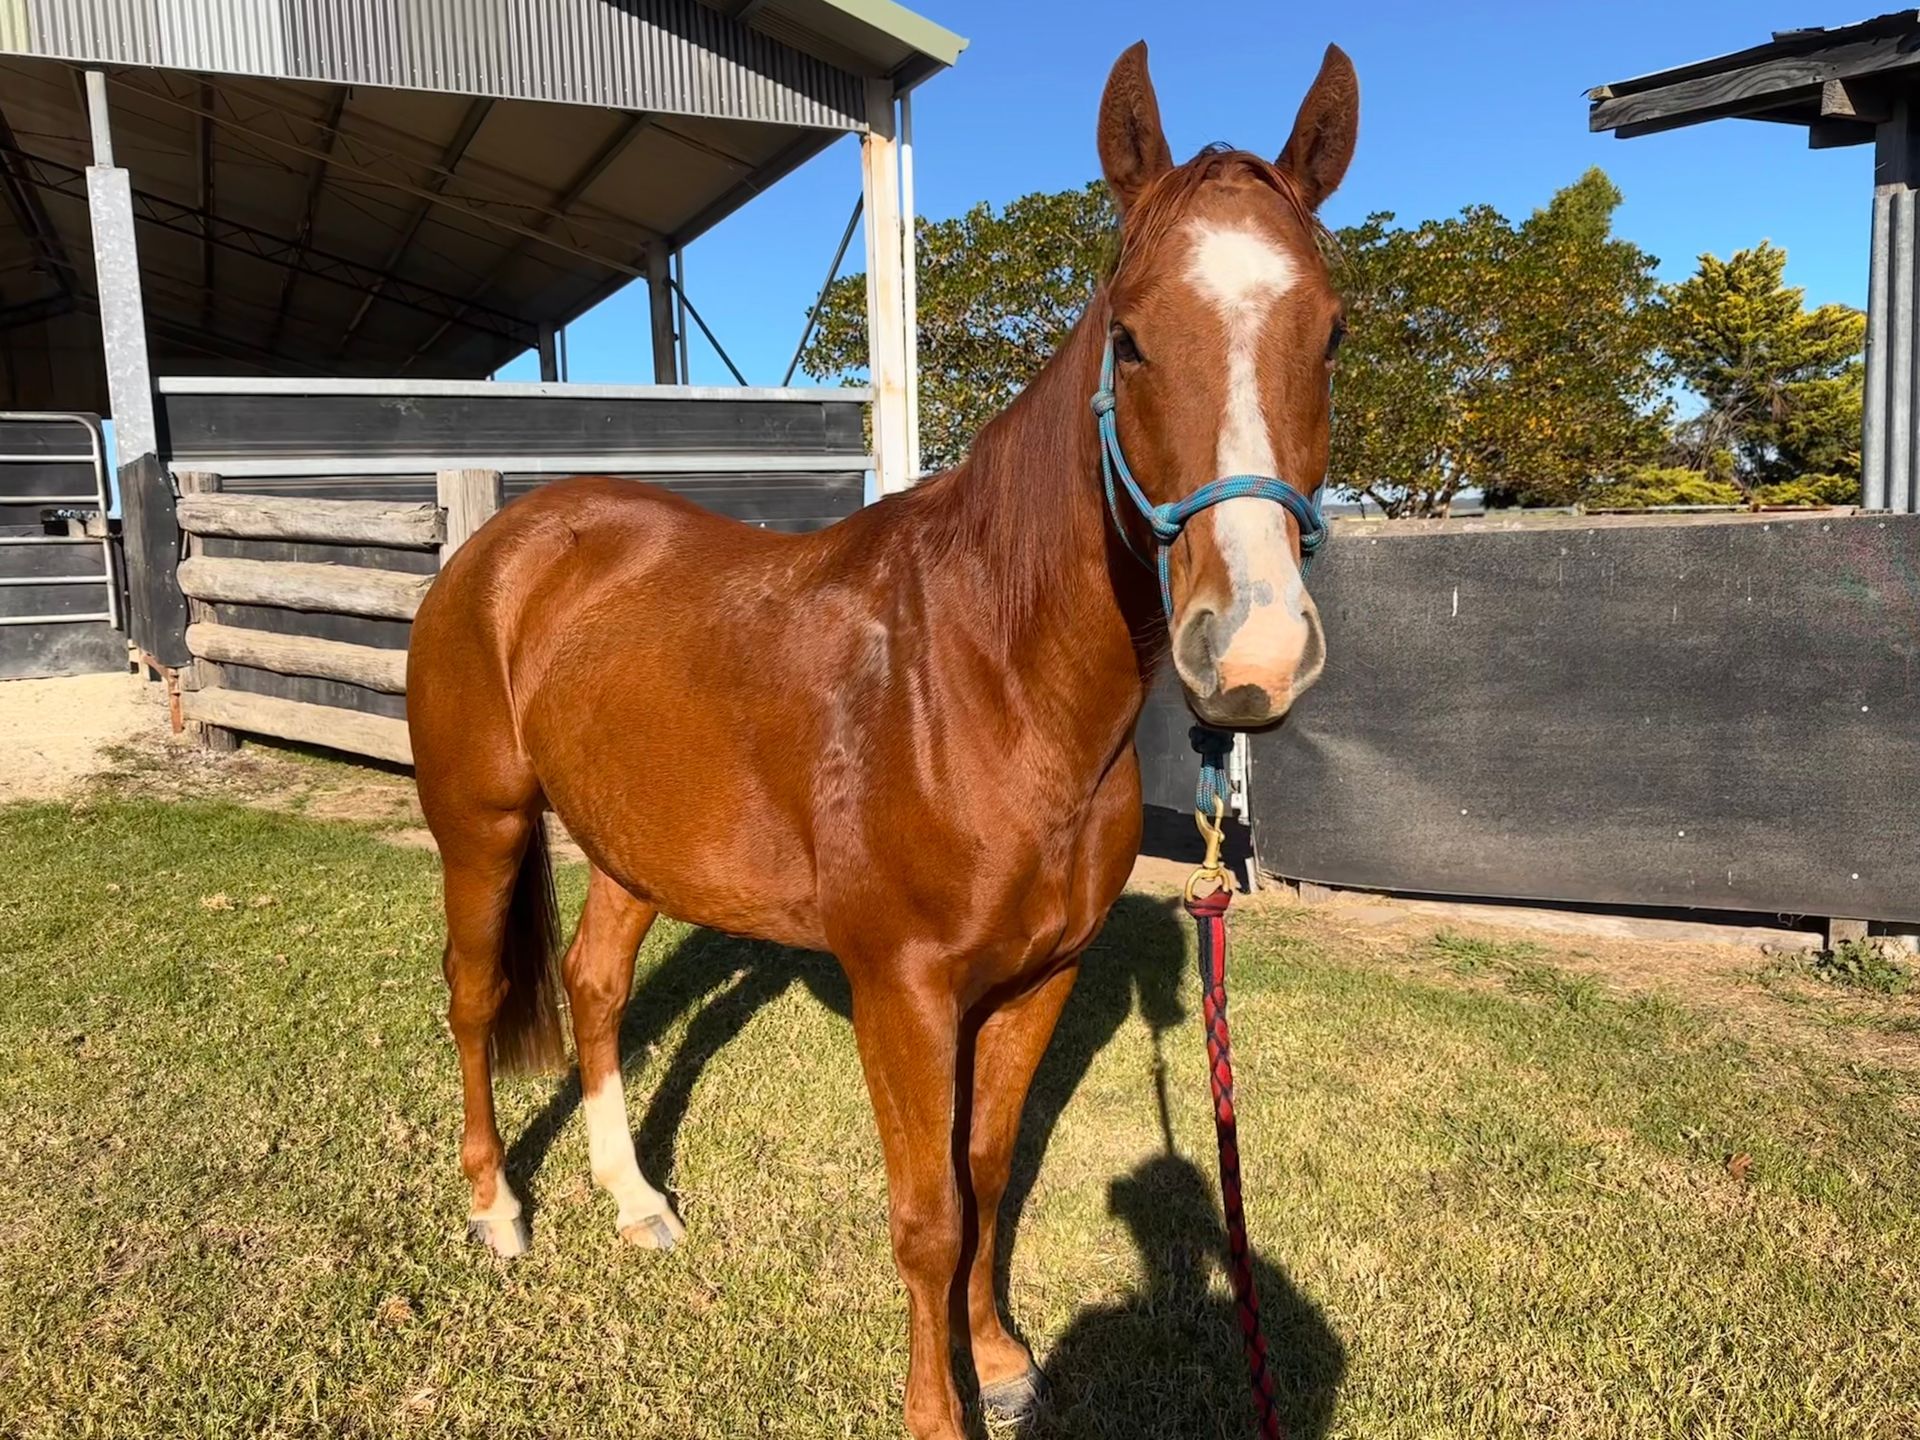
Near Side
Stand your horse square, photograph from the near side at mid-body height, and capture the full horse in even light.
Off Side
Stand your horse square, photograph from the off side at mid-body height, and capture the full horse in even light.
Front
Stand your horse square facing you, take the photo at chest height, and center the frame so both front legs and the head are evenly visible in good light.

Equine Photographers